Using Textractor in AWS Lambda
Textractor uses Pillow for image manipulation which is a compiled dependency (i.e. not pure Python). While we encourage you to build your own lambda layers, we received several requests mentioning that the process tedious, which is why we also offer precompiled layers as zip files that you can directly upload to lambda.
The precompiled layers are rebuilt on release and can be downloaded here https://github.com/aws-samples/amazon-textract-textractor/actions/workflows/lambda_layers.yml.
Step-by-step
We provide a step by step through the AWS Console, but note that proceeding with the AWS CLI would also work. For brevity we assume that you already have an existing lambda. You can find an excellent guide on how to create a lambda function here: https://docs.aws.amazon.com/lambda/latest/dg/getting-started.html. Note that your lambda function will need to have Textract access. Since we are targeting a wide range of use cases we will use the AmazonTextractFullAccess policy. We recommend that you review your lambda function and tailor the permission to your specific use case.
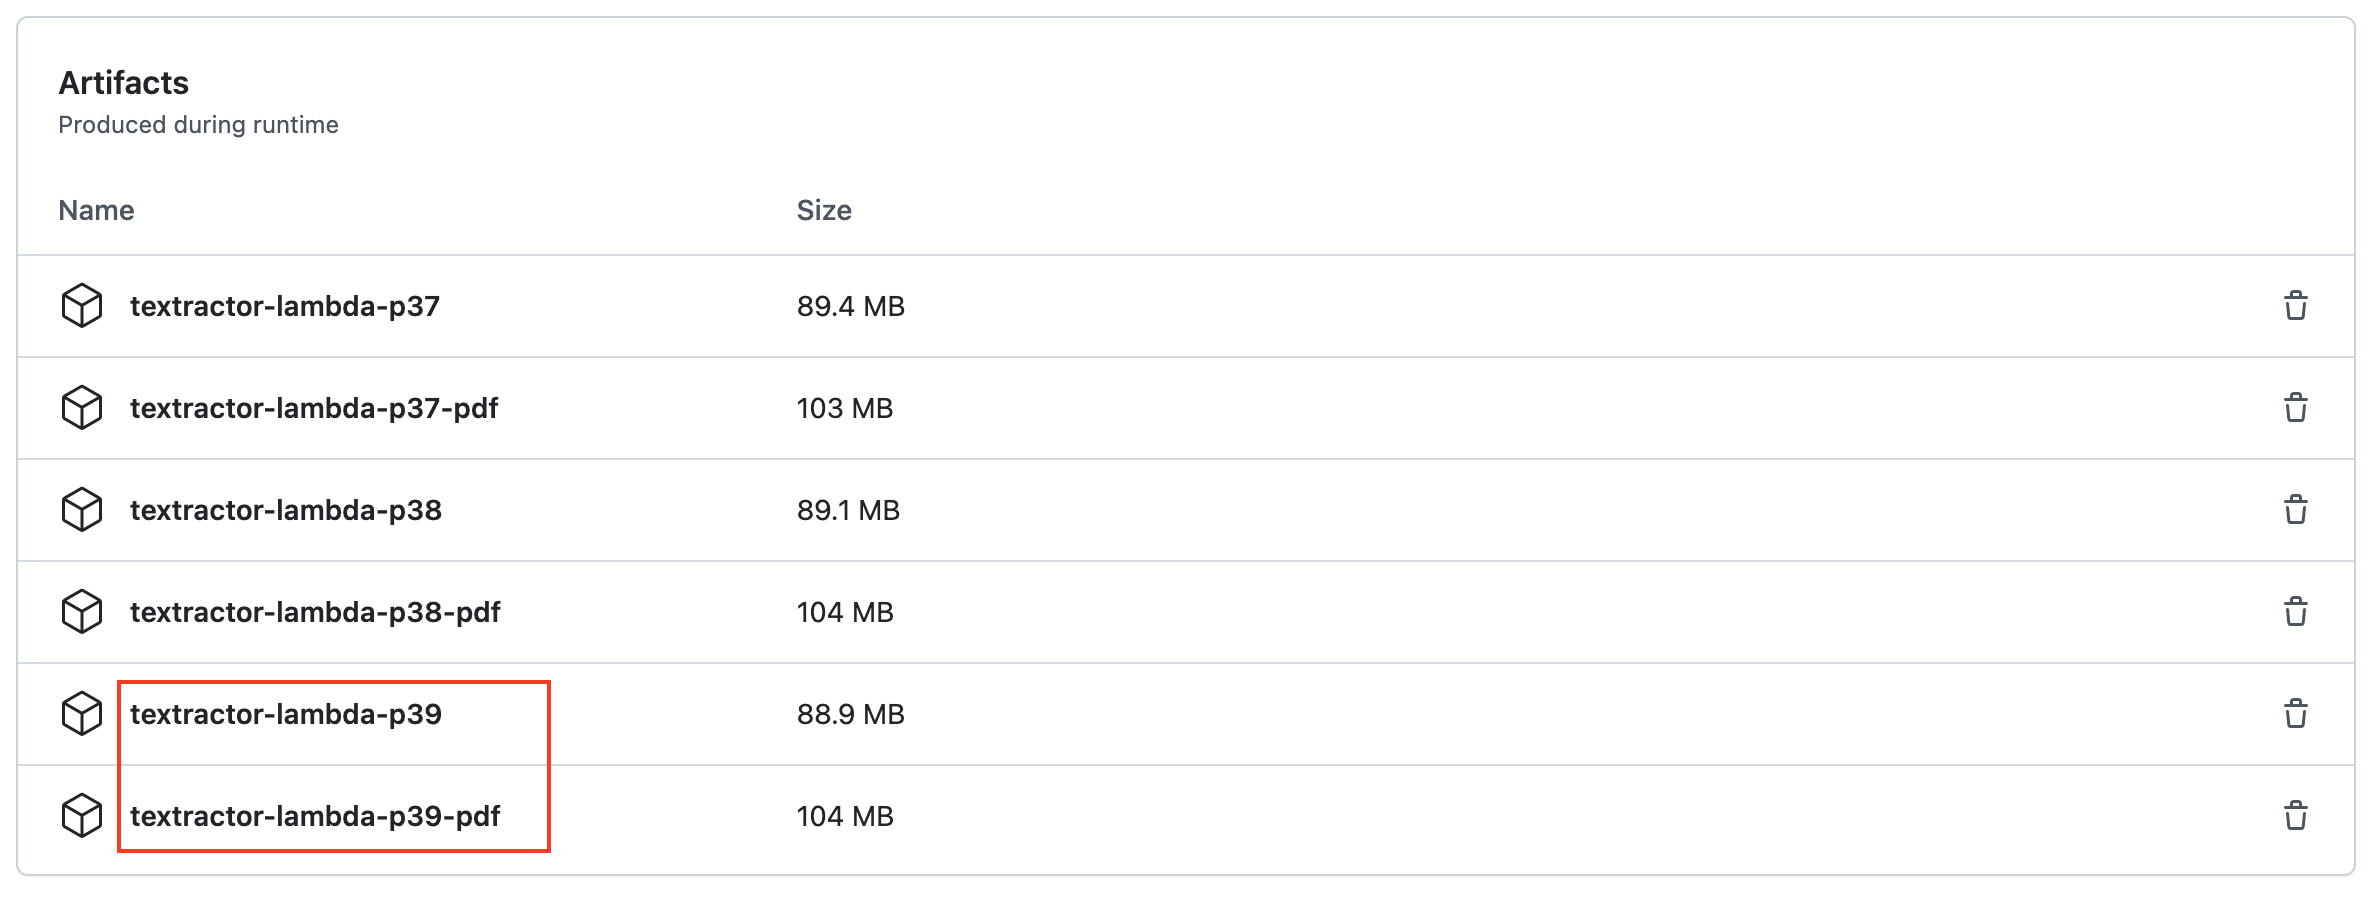
Download the precompiled layers from the GitHub Actions workflow. https://github.com/aws-samples/amazon-textract-textractor/actions/workflows/lambda_layers.yml
Navigate to the page
Click on “Lambda Layers”

Scroll to the bottom of the page and download the package that matches your Python installation. Packages with the -pdfium suffix contain pypdfium2 and allow you to process PDF documents. Packages with the -pdf suffix contain pdf2image and also allow you to process PDF documents, however we recommend using pypdfium2 as it does not require any OS-level dependencies.

In your AWS Console, navigate to “Lambda” and click “Layers” in the sidebar to the left.

Click “Create layer”

Fill-in the form and upload the .zip file you downloaded in step 1.

Click “Create”
Navigate to your lambda
Scroll down and click “Add a layer”

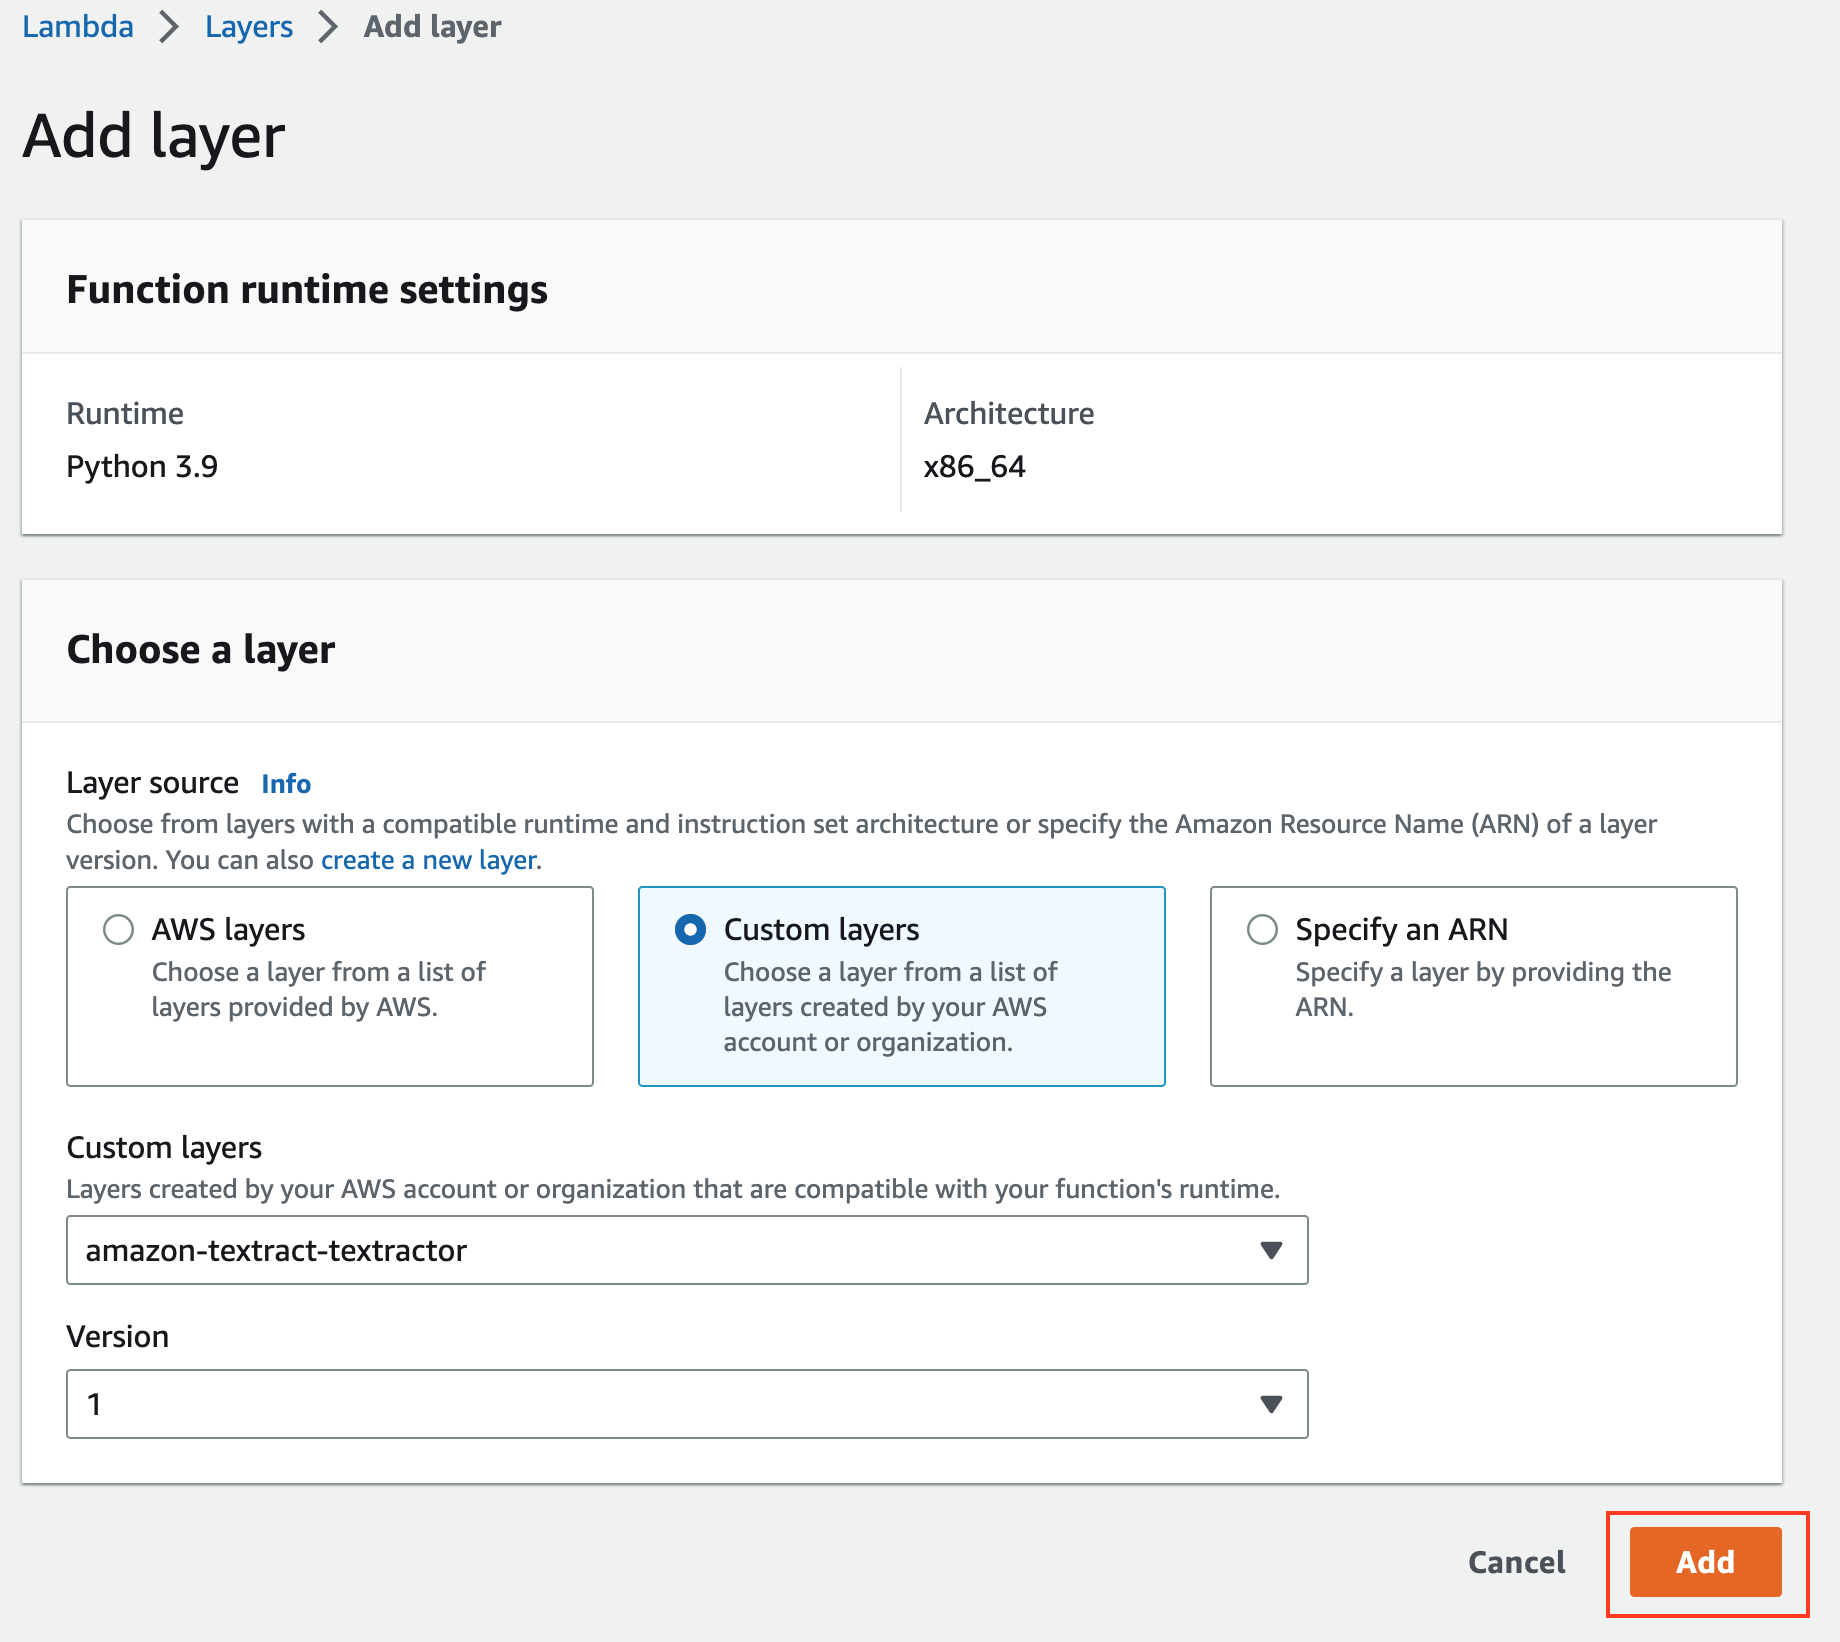
Choose “Custom layers” and pick your amazon-textract-textractor layer
Click “Add”

Update your code to use Textractor
If using the pdf2image PDF version you have to update the PATH and LD_LIBRARY_PATH environment variables through the lambda function configuration interface or directly in code with the os module:
os.environ["LD_LIBRARY_PATH"] = f"/opt/python/bin/:{os.environ['LD_LIBRARY_PATH']}"
os.environ["PATH"] = f"/opt/python/bin/:{os.environ['PATH']}"