デプロイガイド
AWS CloudShellで単一スクリプト(deploy.sh)を実行するだけで、IDPパイプライン全体を自動デプロイします。スクリプトはCloudFormationでCodeBuildプロジェクトを作成し、CodeBuildがCDKを通じて12個のスタックを順次デプロイします。
deploy.sh 実行 (CloudShell) → CloudFormation スタック作成 → CodeBuild プロジェクトプロビジョニング → CDK Bootstrap → VPC スタックデプロイ → 残り11スタック並列デプロイ (concurrency=4) → Cognito 管理者アカウント作成リージョンの確認
Section titled “リージョンの確認”以下のリージョンでのデプロイを推奨します:
| リージョン | 説明 |
|---|---|
| us-east-1 (N. Virginia) | 全モデル対応 |
| us-west-2 (Oregon) | 全モデル対応 |
デプロイ手順
Section titled “デプロイ手順”Step 1. CloudShellを開く
Section titled “Step 1. CloudShellを開く”AWS Console上部のCloudShellアイコンをクリックするか、検索バーで「CloudShell」と入力してアクセスします。
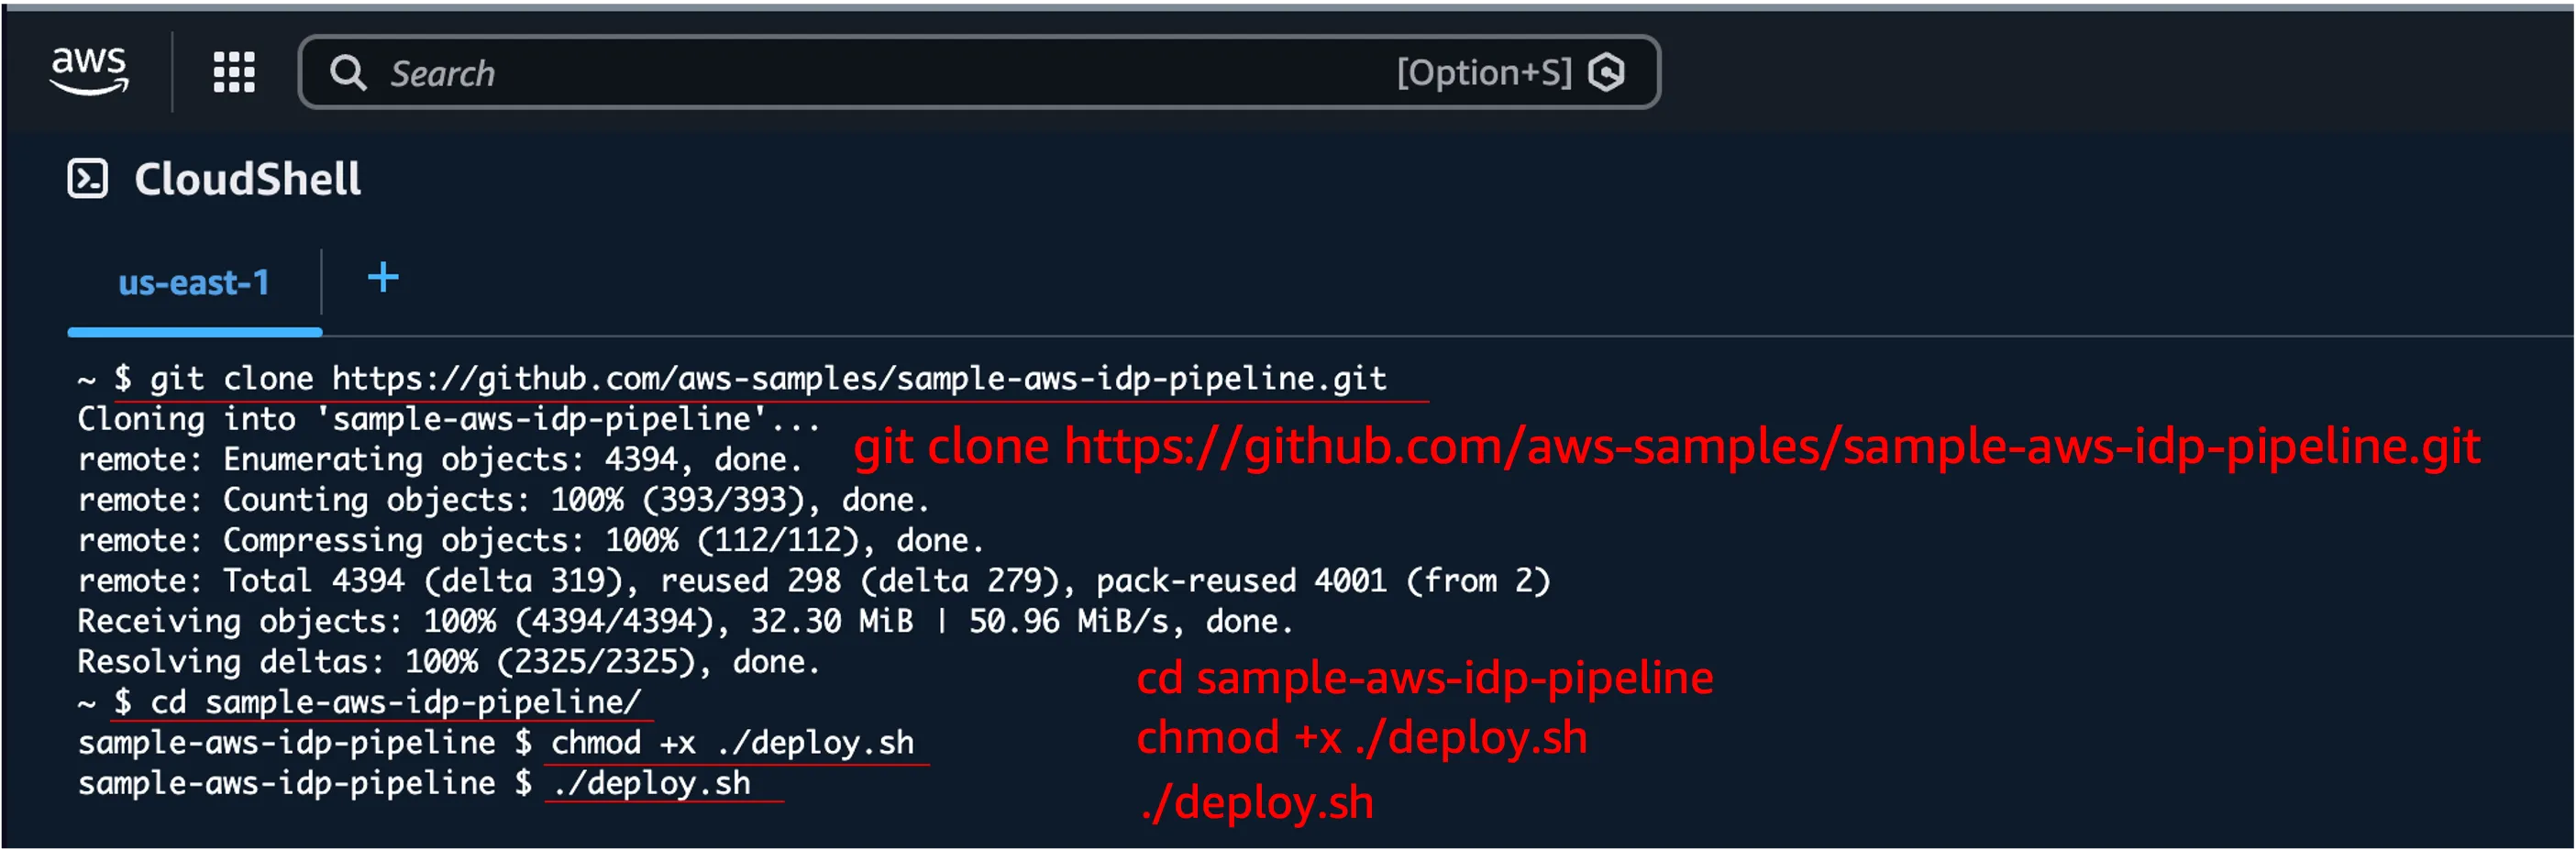
Step 2. デプロイスクリプトの実行
Section titled “Step 2. デプロイスクリプトの実行”git clone https://github.com/aws-samples/sample-aws-idp-pipeline.gitcd sample-aws-idp-pipelinechmod +x ./deploy.sh./deploy.shStep 3. 管理者メールアドレスの入力
Section titled “Step 3. 管理者メールアドレスの入力”スクリプトが実行されると、管理者アカウント用のメールアドレスを入力します。このメールでCognitoユーザーが作成されます。
===========================================================================  Sample AWS IDP Pipeline - Automated Deployment---------------------------------------------------------------------------  Deploys the full IDP pipeline via CodeBuild.
  Stacks: Vpc, Storage, Event, Bda, Ocr, Transcribe, Workflow,          Websocket, Worker, Mcp, Agent, Application===========================================================================
Enter admin user email address: your-email@example.com
Step 4. 設定確認とデプロイ開始
Section titled “Step 4. 設定確認とデプロイ開始”入力した設定を確認し、yを入力してデプロイを開始します。
Configuration:--------------Admin Email: your-email@example.comRepository:  https://github.com/aws-samples/sample-aws-idp-pipeline.gitVersion:     mainStack Name:  sample-aws-idp-pipeline-codebuild
Do you want to proceed with deployment? (y/N): y
デプロイが開始されると、以下の手順が自動的に実行されます:
- CloudFormationテンプレートのダウンロードと検証
- CodeBuildプロジェクトの作成(CloudFormation)
- CodeBuildビルドの開始
- CDK Bootstrap(初回のみ)
- 12個のスタックを順次/並列デプロイ
- Cognito管理者アカウントの作成
デプロイの監視
Section titled “デプロイの監視”CloudShellで確認
Section titled “CloudShellで確認”スクリプトがCodeBuildビルドの進行状況をリアルタイムで表示します。
Starting CodeBuild: sample-aws-idp-pipeline-deploy ...Build ID: sample-aws-idp-pipeline-deploy:xxxxxxxx
You can monitor progress in the AWS Console:  CodeBuild > Build projects > sample-aws-idp-pipeline-deploy
Phase: BUILD
CodeBuild Consoleで確認
Section titled “CodeBuild Consoleで確認”詳細なログを確認するには、AWS ConsoleでCodeBuildプロジェクトを直接確認できます。
AWS Console > CodeBuild > Build projects > sample-aws-idp-pipeline-deploy
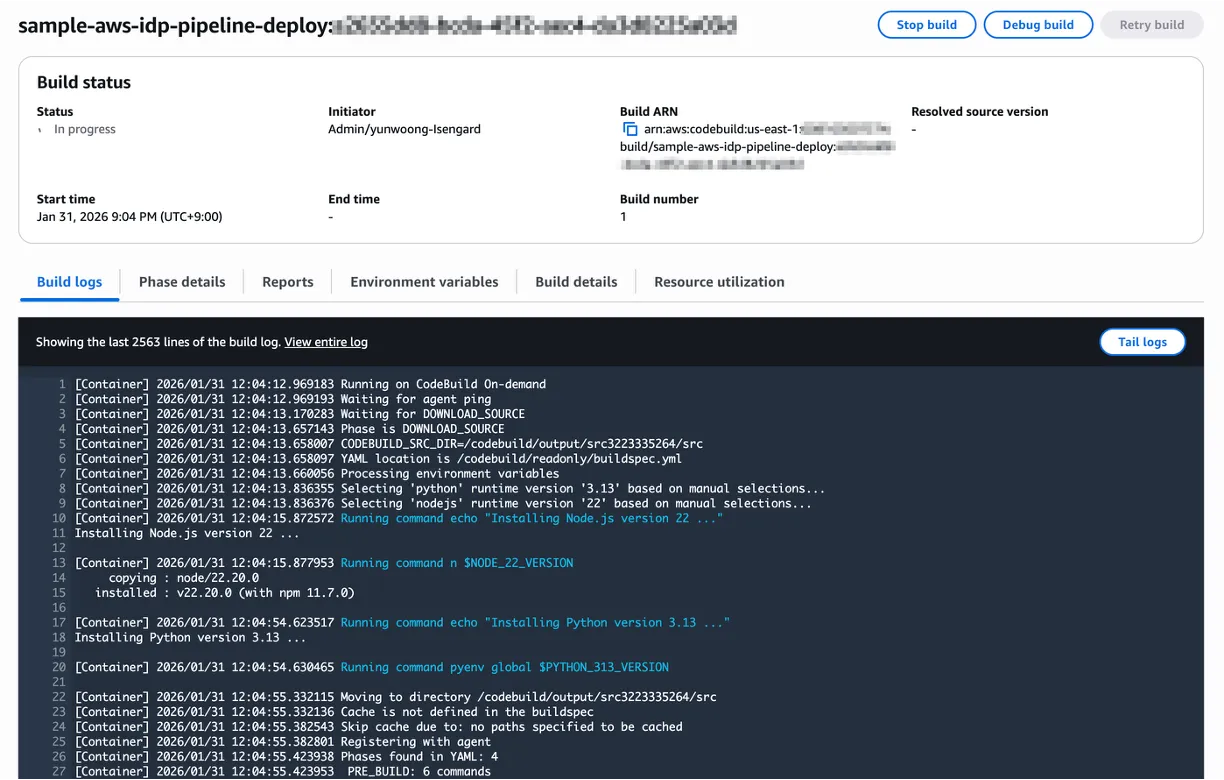
CodeBuild ビルドフェーズ
Section titled “CodeBuild ビルドフェーズ”| フェーズ | 内容 | 予想時間 |
|---|---|---|
| INSTALL | Node.js 22, Python 3.13, pnpm, CDK, Docker QEMUセットアップ | 2-3分 |
| PRE_BUILD | ソースクローン、依存関係インストール(pnpm install) | 3-5分 |
| BUILD | Lint, Compile, Test, Bundle + CDKデプロイ(12スタック) | 30-50分 |
| POST_BUILD | Cognito管理者アカウント作成、URL出力 | 1分 |
デプロイ完了
Section titled “デプロイ完了”デプロイが正常に完了すると、以下の情報が表示されます。
=========================================================================== Deployment Successful===========================================================================
Application URL: https://dxxxxxxxxxx.cloudfront.net
Login Credentials: Email: your-email@example.com Temporary Password: TempPass123!
Next Steps: 1. Access the application using the URL above 2. Log in with the credentials 3. Change your password when prompted
To destroy all resources: aws cloudformation delete-stack --stack-name sample-aws-idp-pipeline-codebuild
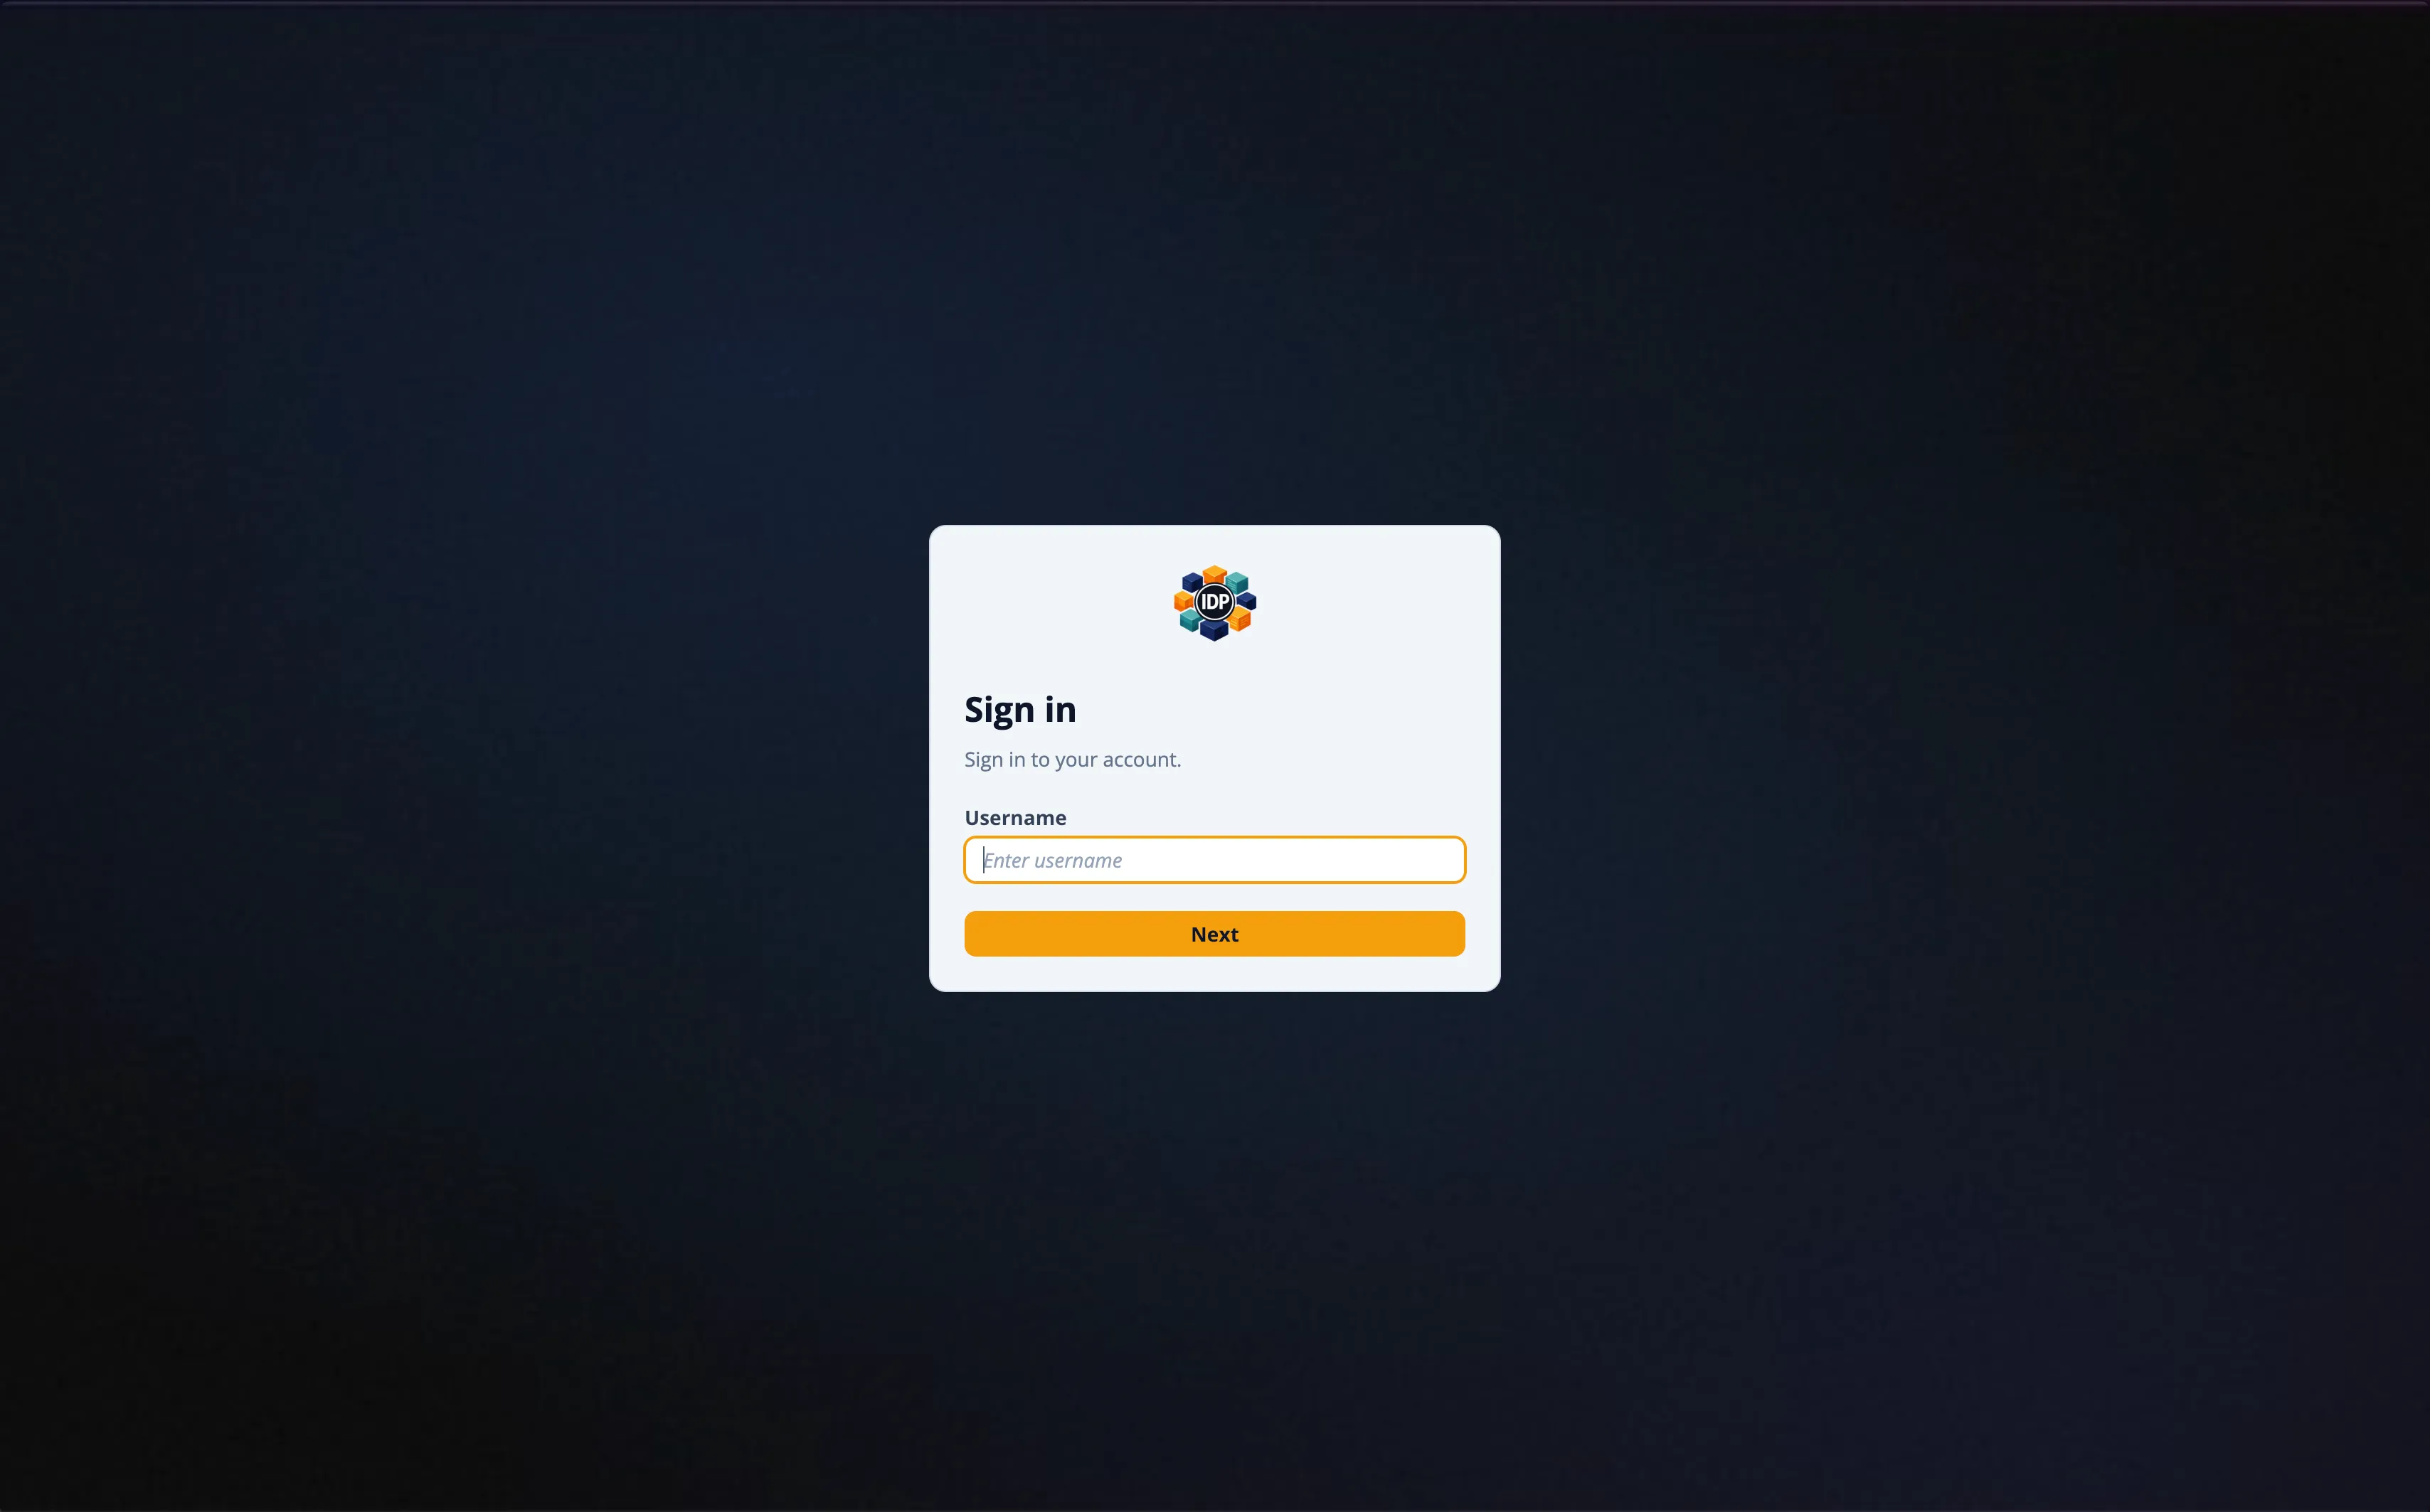
===========================================================================アクセスとログイン
Section titled “アクセスとログイン”- Application URLにアクセスします
- メールアドレスの
@の前の部分がユーザー名です(例:your-email@example.com→your-email) - 一時パスワード
TempPass123!でログインします - 初回ログイン時にパスワード変更が求められます
高度なオプション
Section titled “高度なオプション”コマンドラインオプション
Section titled “コマンドラインオプション”./deploy.sh [OPTIONS]
Options: --admin-email EMAIL 管理者メール(対話的入力をスキップ) --repo-url URL リポジトリURL(デフォルト: github.com/aws-samples/...) --version VERSION デプロイするブランチまたはタグ(デフォルト: main) --stack-name NAME CloudFormationスタック名(デフォルト: sample-aws-idp-pipeline-codebuild) --info デプロイ済みアプリケーションURLを表示 --help ヘルプメッセージを表示デプロイURL再確認
Section titled “デプロイURL再確認”./deploy.sh --info特定バージョンのデプロイ
Section titled “特定バージョンのデプロイ”./deploy.sh --admin-email user@example.com --version v1.0.0リソース削除
Section titled “リソース削除”destroy.sh の実行
Section titled “destroy.sh の実行”デプロイされたすべてのリソースを削除するには、destroy.shスクリプトを実行します。デプロイと同様にCodeBuildを通じて12個のスタックを逆順で削除します。
cd sample-aws-idp-pipelinechmod +x ./destroy.sh./destroy.sh=========================================================================== Sample AWS IDP Pipeline - Automated Destroy--------------------------------------------------------------------------- Destroys all IDP pipeline resources via CodeBuild.
Stacks: Application, Agent, Mcp, Worker, Websocket, Workflow, Transcribe, Bda, Ocr, Event, Storage, Vpc===========================================================================
WARNING: This will permanently delete all IDP pipeline resources.
Do you want to proceed with destroy? (y/N): y削除が完了すると、destroy用のCodeBuildスタックも自動的にクリーンアップされます。
削除が失敗した場合
Section titled “削除が失敗した場合”一部のリソースが削除されない場合があります(例:S3バケットにデータが残っている場合、ENIがまだ使用中の場合など)。この場合:
- AWS Console > CloudFormationで
DELETE_FAILED状態のスタックを確認します - 該当スタックのEventsタブで失敗原因を確認します
- 問題のあるリソースを手動で削除した後、CloudFormationからスタックを再度削除します
トラブルシューティング
Section titled “トラブルシューティング”CloudShellセッションタイムアウト
Section titled “CloudShellセッションタイムアウト”CloudShellは20分間未使用の場合、セッションが終了します。デプロイスクリプト実行後にCodeBuildが開始されると、CloudShellセッションが終了してもCodeBuildビルドは継続されます。CodeBuild Consoleで進行状況を確認できます。
CodeBuildビルド失敗
Section titled “CodeBuildビルド失敗”ビルド失敗時にログを確認します:
# 最近のビルドログを確認aws logs tail /aws/codebuild/sample-aws-idp-pipeline-deploy --since 10m一般的な失敗原因
Section titled “一般的な失敗原因”| 原因 | 解決方法 |
|---|---|
| Bedrockモデルアクセス未有効化 | Bedrock Consoleで必要なモデルのアクセスを有効化 |
| サービスクォータ超過 | AWS Supportでクォータ増加をリクエスト |
| CDK Bootstrap失敗 | aws cloudformation delete-stack --stack-name CDKToolkit 後に再デプロイ |
| VPC制限超過 | 使用していないVPCを削除するかクォータ増加をリクエスト |
デプロイアーキテクチャ
Section titled “デプロイアーキテクチャ”CloudShell │ ├─ deploy.sh │ ├─ CloudFormation Template ダウンロード (deploy-codebuild.yml) │ ├─ CloudFormation Stack 作成 │ │ └─ CodeBuild Project (IAM Role: PowerUserAccess + IAM) │ └─ CodeBuild Build 開始 │ └─ CodeBuild (BUILD_GENERAL1_LARGE, amazonlinux 5.0) ├─ INSTALL: Node.js 22, Python 3.13, pnpm, CDK, Docker QEMU (ARM64) ├─ PRE_BUILD: git clone → pnpm install ├─ BUILD: lint + test + bundle → CDK deploy (12 stacks) └─ POST_BUILD: Cognito admin user 作成