Keycloak and Cognito OIDC integration
Keycloak describes itself as:
Open Source Identity and Access Management For Modern Applications and Services
This is a short guide on how to configure OIDC federation between cognito and keycloak. This guide is not a recommendation for keycloak and assumes a certain level of knowledge and familiarity with it.
This guide is for example purposes only and additional configuration may be required to meet your security/integration requirements.
- Under the desired realm within keycloak navigate to clients and create a new client using the
create clientbutton and selectOpenID Connect. - You will need to enter a
Client IDthis is something to identify the integration and then clickNext - Toggle on
Client Authenticationand clickNext - Finally click
Save. - You will need to deploy the chatbot after finishing its confiugration before creating the OIDC client within Keycloak.
- See details on Cognito Overview for the configuration options for federation
- Use the
Client IDset previously and grab theClient Secretfrom theCredentialstab within the previously created keycloak client. - You will need to supply the OIDC issuer base url for keycloak to the installer however. In Keycloak this is found under Realm Settings for the KeycLoak Realm you will create the client under. For example:
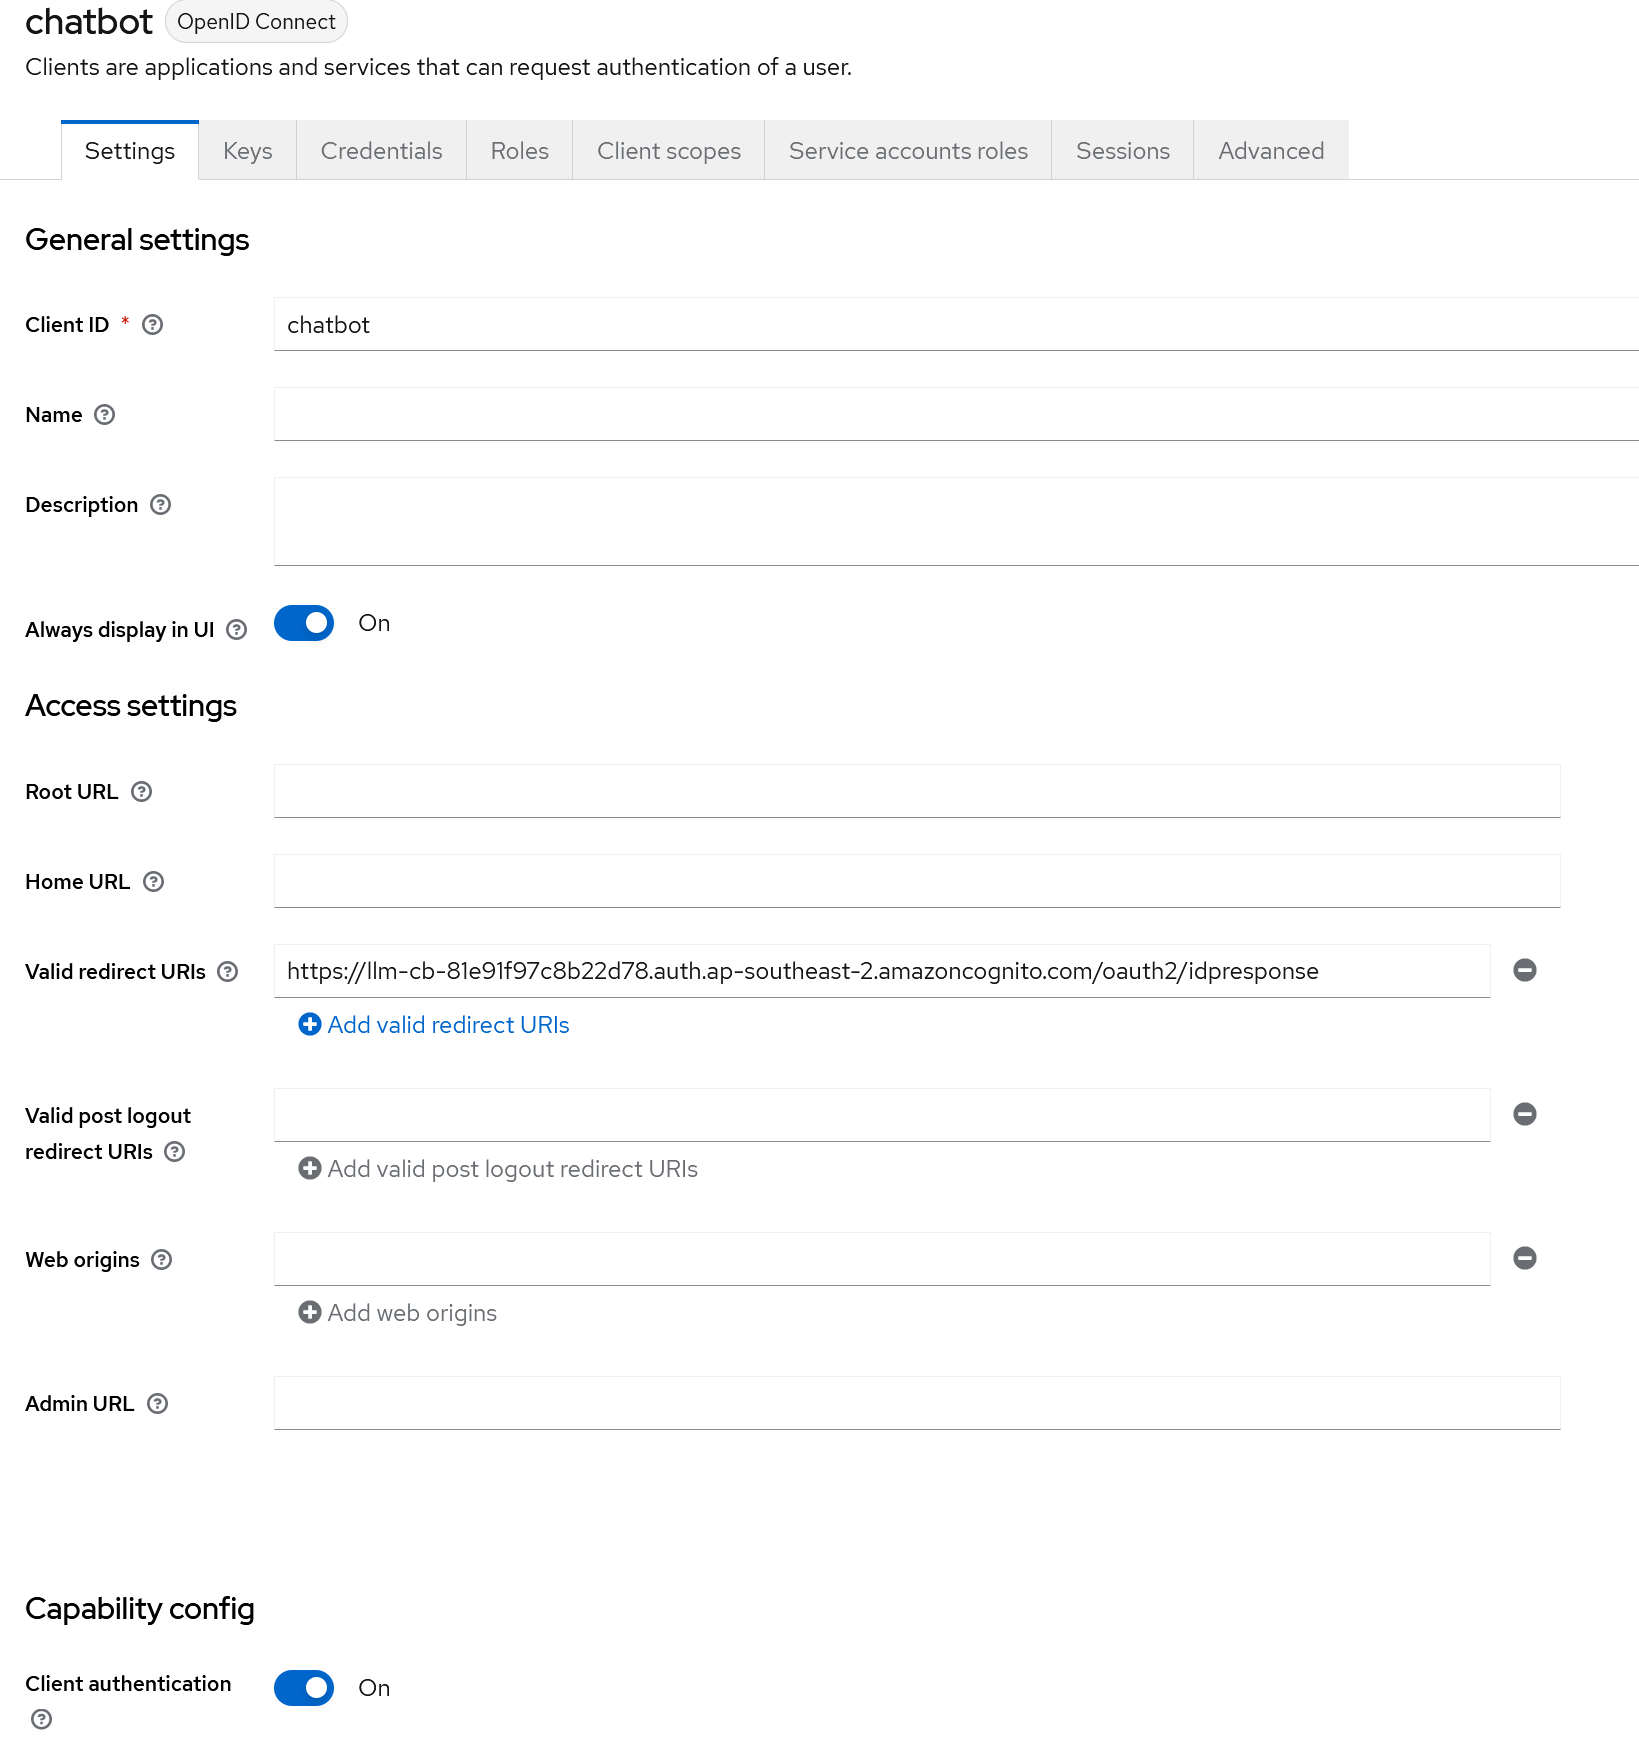
https://<keycloak-domain>/realms/NGINX/ - Once the chatbot has been successfully deployed we can now update the Keycloak Client with the
Valid redirect URIs, field must be set to the Cognito Hosted UI domain name with/oauth2/idresponse(see below picture for example). then clickSave.

You may also want to map metadata attributes such as email, firstname, lastname etc. however this is not covered in this guide.