Auto-register resources with AppRegistry
What are we going to do?
We are going to perform the following steps:
- Update service templates and updated the service instances using the new service template version
- Associate Proton service instances resources with AppRegistry application and further enrich the application metadata
- Validate Proton service instances and metadata is associated with the AppRegistryApplication
Step-by-step guide
Here are the steps you need to follow to update AWS Proton templates and associate resources, and it’s metadata with AppRegistry application.
Now that we’ve mapped the environment resources to an application, the next step is to map the Proton service instances so that all application resources will be identifiable by belonging to an application.
Navigate to service/instance_infrastructure and open cloudformation.yaml by running the command below.
cd ~/environment/moving-up-stack-workshop/resources/code/scenario3/loadbalanced-fargate-redis-mysql/service/instance_infrastructure

# open file in Cloud9 editor
c9 cloudformation.yaml
Add new AWS resources under Resources.
Please verify the indentation is correct when pasting into the yaml file. Also, please make sure you save the file before moving to the next step.
AppRegistryResourceAssociation:
  Type: AWS::ServiceCatalogAppRegistry::ResourceAssociation
  Properties:
    Application: "{{ environment.outputs.ApplicationName }}"
    Resource: !Ref AWS::StackName
    ResourceType: CFN_STACK
AppRegistryAttributeGroup:
  Type: AWS::ServiceCatalogAppRegistry::AttributeGroup
  Properties:
    Attributes: {
      "ApplicationName": "{{ environment.outputs.ApplicationName }}",
      "CostCenter": "{{ environment.outputs.CostCenter }}",
      "LOB_Owner": "{{ environment.outputs.LobOwner }}",
      "OnCall": {
        "PrimaryName": "{{service_instance.inputs.on_call_primary_name}}",
        "PrimaryPhone": "{{service_instance.inputs.on_call_primary_phone}}",
        "EscalationVP": "{{service_instance.inputs.on_call_escalation_vp}}",
        "EscalationPhone": "{{service_instance.inputs.on_call_escalation_phone}}"
      },
      "AppMeta": {
        "ReferenceArchitecture": "{{service_instance.inputs.app_meta_reference_architecture}}"
      }
    }
    Description: "{{ environment.outputs.ApplicationName }}-{{ environment.name }}-{{service.name}}-{{service_instance.name}}"
    Name: "{{ environment.outputs.ApplicationName }}-{{ environment.name }}-{{service.name}}-{{service_instance.name}}"
AppRegistryAttributeGroupAssociation:
  Type: AWS::ServiceCatalogAppRegistry::AttributeGroupAssociation
  Properties:
    Application: "{{ environment.outputs.ApplicationName }}"
    AttributeGroup: "{{ environment.outputs.ApplicationName }}-{{ environment.name }}-{{service.name}}-{{service_instance.name}}"
  DependsOn:
    - AppRegistryAttributeGroup
Navigate to service/schema and open schema.yaml by running the command below.
cd ~/environment/moving-up-stack-workshop/resources/code/scenario3/loadbalanced-fargate-redis-mysql/service/schema

# open file in Cloud9 editor
c9 schema.yaml
Add the new input attributes in LoadBalancedServiceInput under properties.
on_call_primary_name:
  type: string
  description: "On call primary name"
on_call_primary_phone:
  type: string
  description: "On call primary phone number"
on_call_escalation_vp:
  type: string
  description: "On call escalation VP"
on_call_escalation_phone:
  type: string
  description: "On call escalation phone number"
app_meta_reference_architecture:
  type: string
  description: "URL to the application reference architecture"
Declare those inputs as required under LoadBalancedServiceInput.
required:
  - on_call_primary_name
  - on_call_primary_phone
  - on_call_escalation_vp
  - on_call_escalation_phone
The final schema in schema.yaml should look as below in the example.
Please make sure you save the file before moving to the next step.
# Other attributes
...
types:
    LoadBalancedServiceInput:
      # Other attributes
      ...
      required:
        - on_call_primary_name
        - on_call_primary_phone
        - on_call_escalation_vp
        - on_call_escalation_phone
      properties:
        # Other attributes
        ...
        on_call_primary_name:
          type: string
          description: "On call primary name"
        on_call_primary_phone:
          type: string
          description: "On call primary phone number"
        on_call_escalation_vp:
          type: string
          description: "On call escalation VP"
        on_call_escalation_phone:
          type: string
          description: "On call escalation phone number"
        app_meta_reference_architecture:
          type: string
          description: "URL to the application reference architecture"
Create service template bundle by zipping the files, and upload the bundle to your S3 bucket.
cd ~/environment/moving-up-stack-workshop/resources/code/scenario3/loadbalanced-fargate-redis-mysql

tar -czf farRedMy-svc-template-posts-v2.tar.gz service/
aws s3 cp \
  farRedMy-svc-template-posts-v2.tar.gz \
  s3://proton-cli-templates-${ACCOUNT_ID}-${AWS_DEFAULT_REGION}/farRedMy-svc-template-posts-v2.tar.gz
rm farRedMy-svc-template-posts-v2.tar.gz
Now that the new bundle is uploaded to your S3 bucket, create new version of the existing service template.
aws proton create-service-template-version \
  --template-name "Fargate-Public-LoadBalanced-Service-Redis-MySQL" \
  --source s3="{bucket=proton-cli-templates-${ACCOUNT_ID}-${AWS_DEFAULT_REGION},key=farRedMy-svc-template-posts-v2.tar.gz}" \
  --compatible-environment-templates '[{"templateName":"Fargate-Public-Private-VPC","majorVersion":"2"}]'
You can now publish the new service template version, making it available for posts in your AWS account to either create a new Proton serve or update an existing one which are created from the previous version.
aws proton update-service-template-version \
  --template-name "Fargate-Public-LoadBalanced-Service-Redis-MySQL" \
  --major-version "2" \
  --minor-version "0" \
  --status "PUBLISHED"
What did we just do?
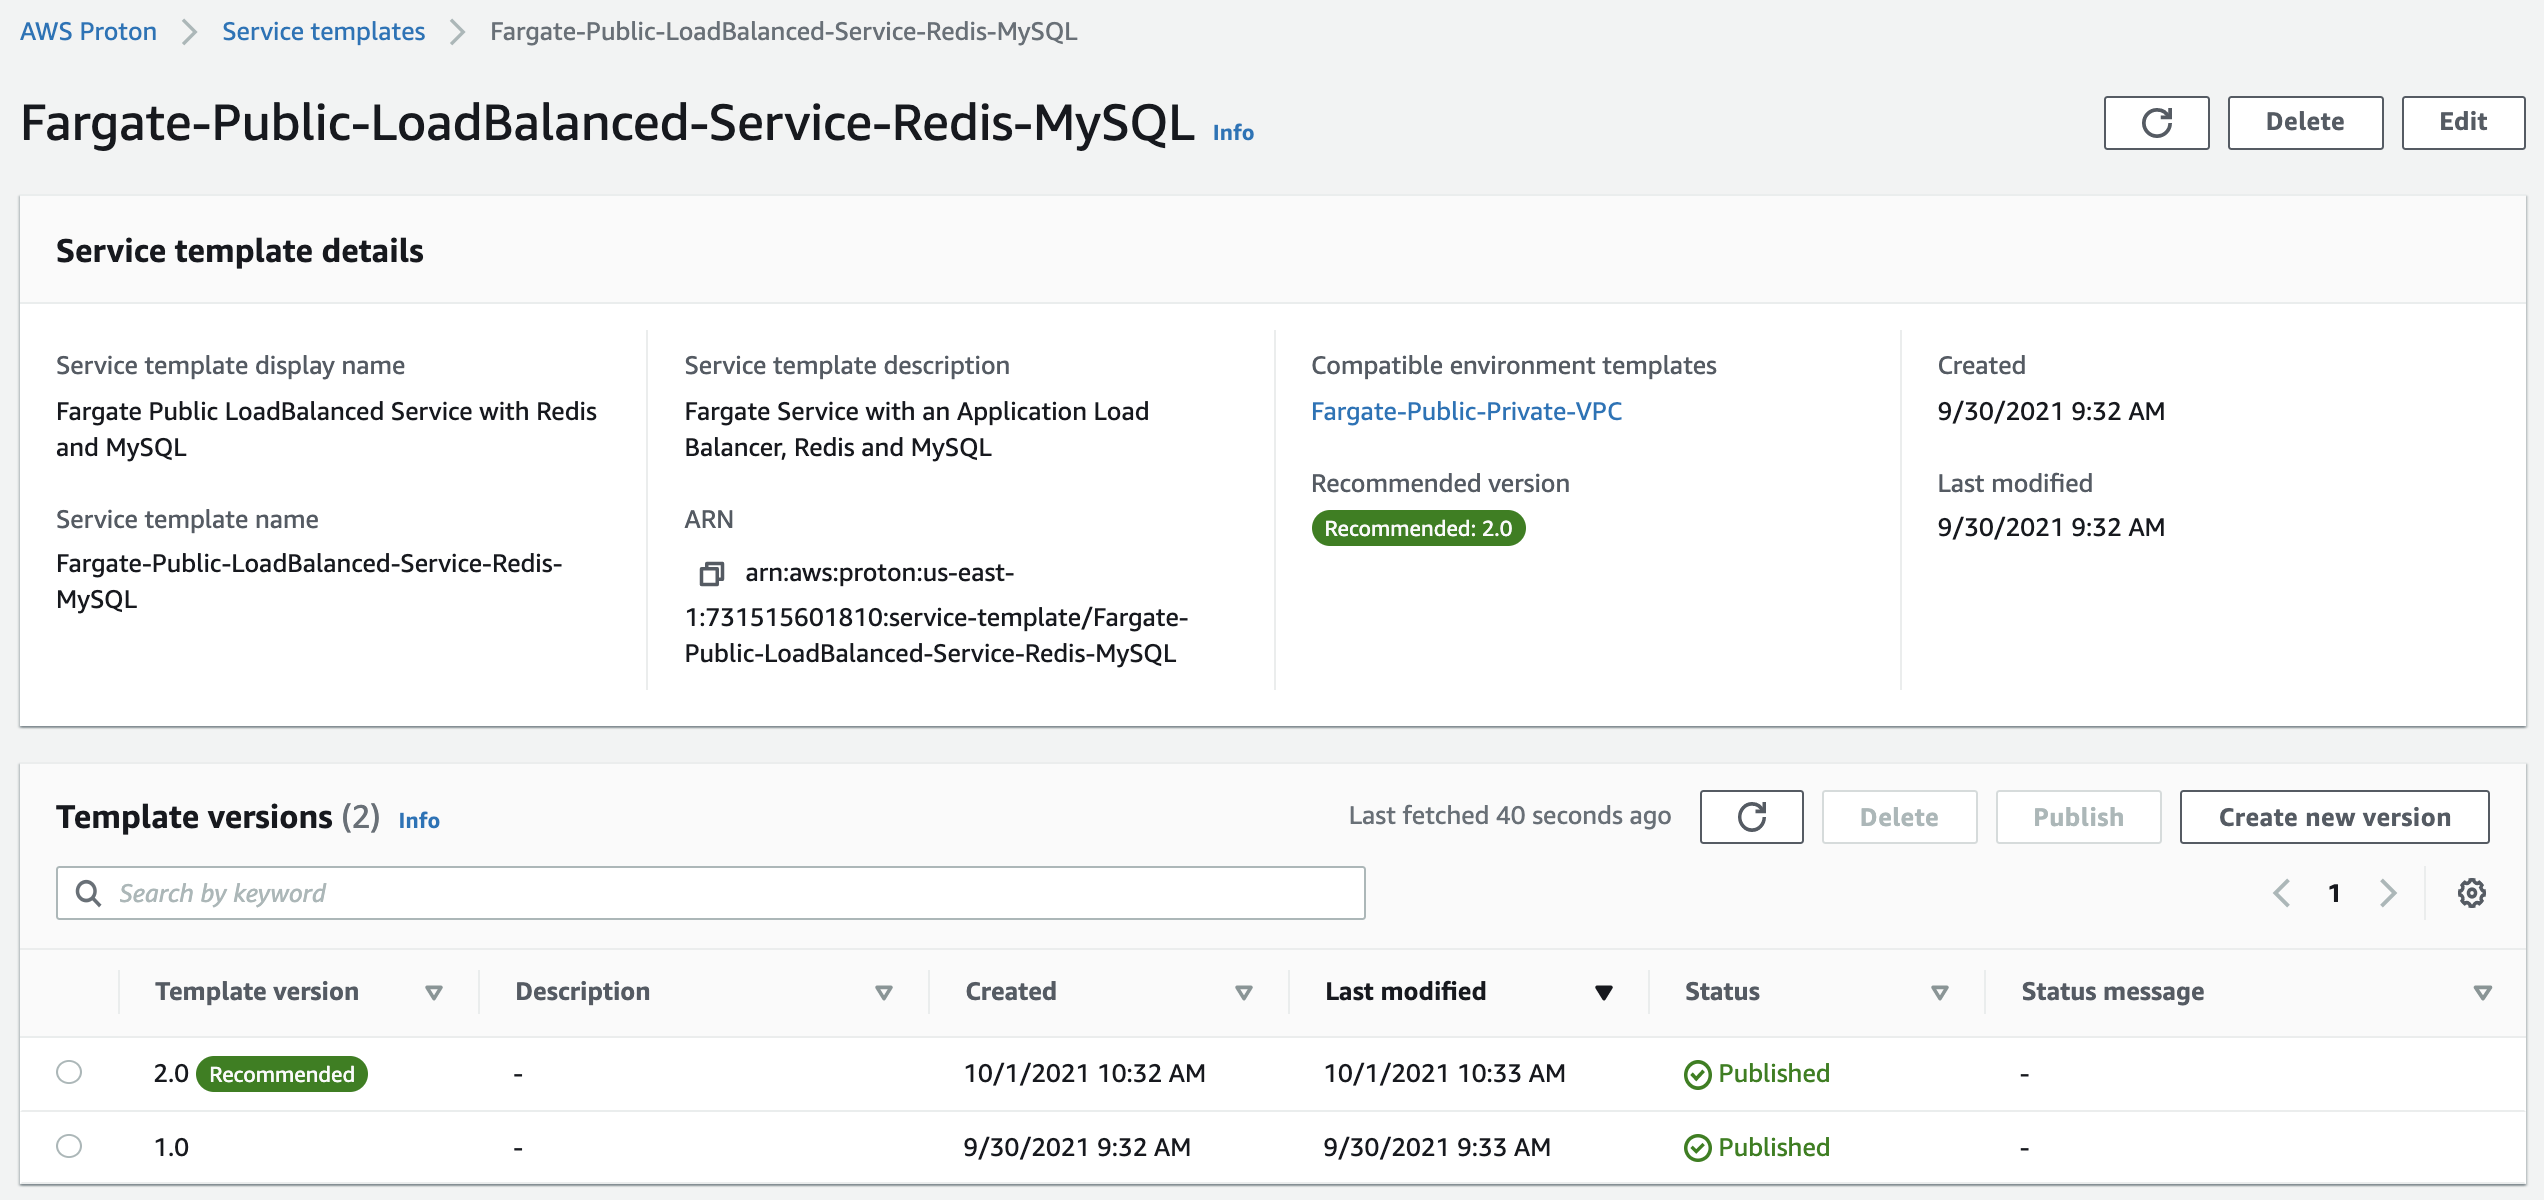
We just updated an existing Proton service template and published it, making this version available for deployment.
Open the Proton console
and check that your new template has the recommended and published version 2.0.

Now let’s update the service to the new version. Open the Proton service instances console
select the deployed service api-posts. Click Actions and choose Update to latest major version.
On Service instance info click Next.
On the Configure custom settings screen:
- For
On call primary nameenter Danny - For
On call primary phoneenter 012-345-6789 - For
On call escalation vpenter Rohn - For
On call escalation phoneenter 987-654-3210 - For
App meta reference architectureenterhttps://myapp-refs-posts-api.com - Scroll down and click
Next
Finally, on the Review screen, click Update. Wait a few minutes for your environment to be created.
What did we just do? We just updated an existing Proton service instance using the new version of the service template. Open the Proton console and check that your service instance is deployed using the new service version.

Next, let’s map other two service instances to the AppRegistry application so all our resources will belong to an application. Since the steps are very similar, we’ll use terminal to complete the steps.
Update the users-api service instance.
cp ~/environment/moving-up-stack-workshop/resources/code/scenario2/loadbalanced-fargate-redis-mysql/api-users.yaml \
  ./specs/api-users.yaml

python ../helper.py \
    "specs" \
    "./specs/api-users.yaml" \
    "../service_template/specs/api-users.yaml"

aws proton update-service-instance \
    --deployment-type MAJOR_VERSION \
    --template-major-version "2" \
    --name "api-users" \
    --service-name "api-users" \
    --spec "file://specs/api-users.yaml"
Update the threads-api service instance.
cp ~/environment/moving-up-stack-workshop/resources/code/scenario2/loadbalanced-fargate-redis-mysql/api-threads.yaml \
  ./specs/api-threads.yaml

python ../helper.py \
    "specs" \
    "./specs/api-threads.yaml" \
    "../service_template/specs/api-threads.yaml"

aws proton update-service-instance \
    --deployment-type MAJOR_VERSION \
    --template-major-version "2" \
    --name "api-threads" \
    --service-name "api-threads" \
    --spec "file://specs/api-threads.yaml"
What did we just do?
We just updated existing api-users and api-threads Proton service instances using the new version of the service template.
Open the Proton Service instances console
and verify that your service instances are deployed using the new service template version 2.0.

Next, now that all the application resources are associated with the application, and we further enriched the application metadata, let’s see how we can query the AppRegistry application to find answers for some questions.