Deployment Process
Table of contents
Clone TEAM repo
To clone the TEAM amplify fullstack project, execute the following command inside an empty directory
git clone https://github.com/aws-samples/iam-identity-center-team.git
This creates a directory named iam-identity-center-team in your current directory.
Update deployment parameters
Create a new file named parameters.sh in the deployment directory. Copy the contents of the file parameters-template.sh to the new file.
cd deployment
cp -n parameters-template.sh parameters.sh
Update the parameters in the parameters.sh file as follows:
Parameters
Required:
- IDC_LOGIN_URL - AWS IAM Identity Center Login URL
- REGION - AWS region where the application will be deployed.
This must be the same region AWS IAM Identity Center is deployed in
- TEAM_ACCOUNT - ID of AWS Account into which TEAM application will be deployed
- ORG_MASTER_PROFILE - Named profile for Organisation master account
- TEAM_ACCOUNT_PROFILE - Named profile for TEAM Application deployment Account
- TEAM_ADMIN_GROUP - Name of IAM Identity Center group for TEAM administrators
- TEAM_AUDITOR_GROUP - Name of IAM Identity Center group for TEAM auditors
- CLOUDTRAIL_AUDIT_LOGS - ARN of organization CloudTrail Lake event datastore
- SECRET_NAME - Name of the Secret stored in AWS Secret Manager
When using Github as the external repository ensure you use Tokens (classic) (https://docs.github.com/en/authentication/keeping-your-account-and-data-secure/managing-your-personal-access-tokens#personal-access-tokens-classic) instead of Fine-grained tokens
Optional:
- TAGS - Tags that should be propagated to nested stacks and underlying resources
- UI_DOMAIN - Custom domain for Amplify hosted frontend application (should only be included if you have setup a custom domain for the frontend application)
- CACHE_TTL - Cache time-to-live in seconds for organizational unit (OU) account lists (default: 604800 = 1 week). Cached entries automatically expire after this duration. Consider increasing this value (e.g., 2592000 = 30 days) for organizations with infrequent account changes. Administrators can also manually invalidate specific OU cache entries or disable caching entirely via the Settings page.
For example:
IDC_LOGIN_URL=https://d-12345678.awsapps.com/start
REGION=us-east-1
TEAM_ACCOUNT=123456789101
ORG_MASTER_PROFILE=OrgMAsterProfileName
TEAM_ACCOUNT_PROFILE=TeamAccountProfileName
TEAM_ADMIN_GROUP="team_admin_group_name"
TEAM_AUDITOR_GROUP="team_auditor_group_name"
TAGS="tag1=value1 tag2=value2"
CLOUDTRAIL_AUDIT_LOGS=arn:aws:cloudtrail:us-east-1:123456789101:eventdatastore/e646f20d-7959-4682-be84-6c5b8a37cf15
UI_DOMAIN=portal.teamtest.online
SECRET_NAME=TEAM-IDC-APP
CACHE_TTL=604800
Run Initialisation Script
The init.sh bash script in the deployment folder configures the following prerequisites required for deploying the TEAM application:
- Configures the TEAM_ACCOUNT as a delegated admin for account management
- Configures the TEAM_ACCOUNT as a delegated admin for cloudtrail management
- Configures the TEAM_ACCOUNT as a delegated admin for AWS IAM Identity Center Management
Ensure that the named profile for the Organisation Management account has sufficient permissions before executing the init.sh script
Execute the following command in the root directory to deploy the script
cd deployment
./init.sh
If the init.sh script is deployed successfully, the output should be similar as shown below
$ 123456789101 configured as delegated Admin for AWS Account Manager
$ 123456789101 configured as delegated Admin for cloudtrail
$ 123456789101 configured as delegated Admin for IAM Identity Center
Run Deployment Script
The deploy.sh bash script in the deployment folder performs the following actions within the TEAM_ACCOUNT :
- Creates a CodeCommit repository and copies the TEAM application directory content to the repository.
- Deploys a cloudformation template that creates an amplify hosted application and CI/CD pipeline for deploying the TEAM application.
Ensure that the named profile for the TEAM Deployment account has sufficient permissions before executing the deploy.sh script
Execute the following command in the root directory to deploy the script
cd deployment
./deploy.sh
Once the deployment script has completed execution and the cloudformation stack has been created successfully, go to the AWS Amplify console to monitor the status of the TEAM application deployment.
It takes about 20 mins to complete the build and deployment of the Amplify application stack
Custom Domain Registration
This step is optional and required only if you have included a UI_DOMAIN parameter and intend to use a custom domain for your TEAM deployment instead of the default amplify generated domain name.
Go to Amplify console: AWS AMPLIFY → All Apps → TEAM-IDC-APP → Domain Management → Add domain.
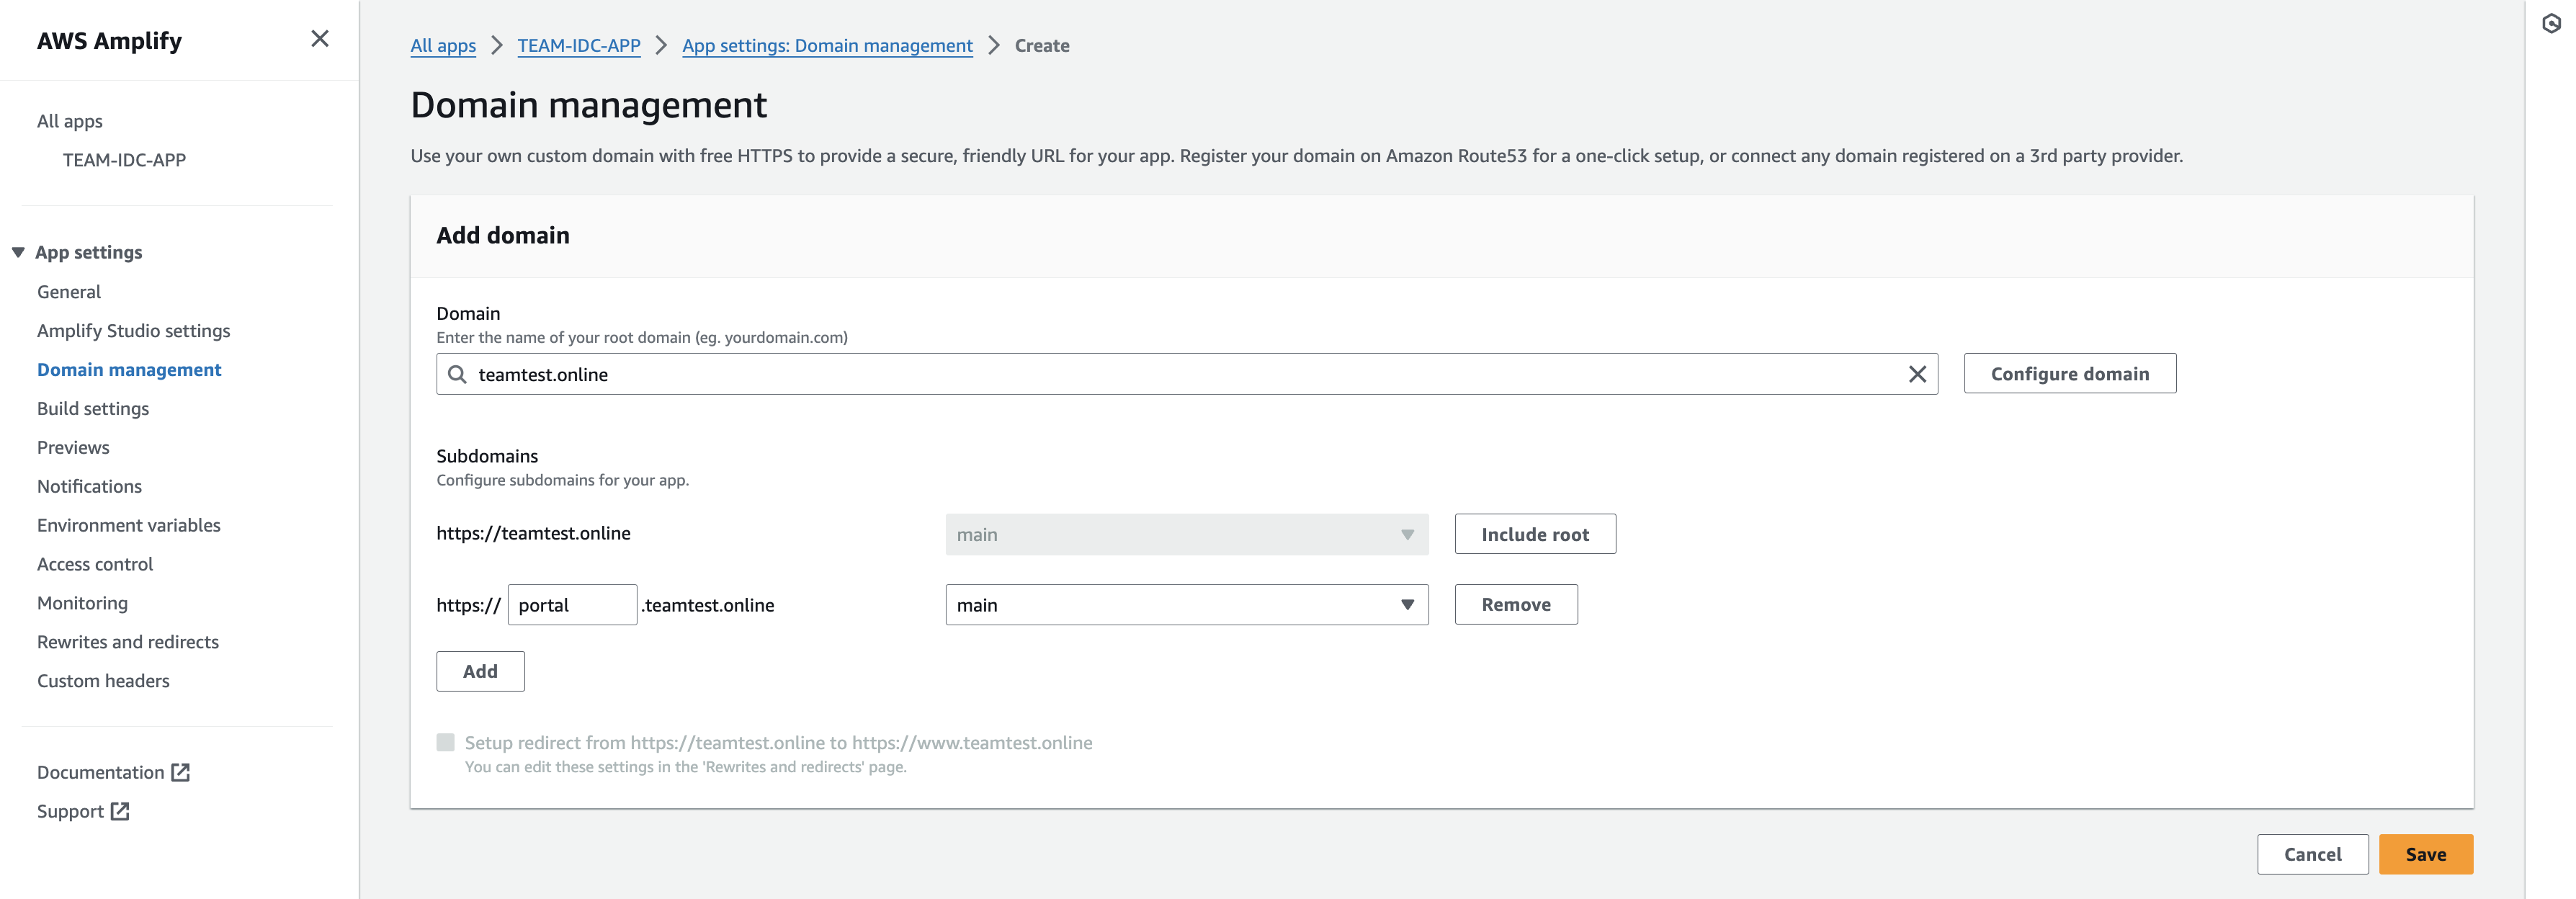
Follow instructions in Amplify documentation for more details on setting up custom domains
Verify app deployment
Go to Amplify console: AWS Amplify -> All apps -> TEAM-IDC-APP -> Hosting environments. On the Hosting environments tab, click on the application URL to confirm that it was deployed successfully and you can access the TEAM application landing page as shown in the video below:
🚀 Next Step: Configure TEAM Application
Deploying TEAM into management account
We strongly recommend and encourage deploying TEAM into a delegated admin account (not management account) as per AWS best practice. If you have a valid use case for deploying in the management account, please proceed with caution and consider the necessity of stringent management account access controls.
To deploy TEAM into management account:
- Instead of using parameters-template.sh file, use the provided parameters-mgmt-template.sh as a template for your paramaters.sh file. This file omits the following parameters:
- TEAM_ACCOUNT
- TEAM_ACCOUNT_PROFILE
and uses ORG_MASTER_PROFILE to deploy the solution.
- Do not run the initialisation script init.sh. You can proceed straight to running the deployment script deploy.sh.