Creating Game Server Build & Fleet
Creating Game Server with GameLift Service
In this page, we are making GameLift Service with Serverless based FlexMatch server binary. We provide Game Server as compiled binary, therefore you don’t need to build by yourselves. But if you want, you are able to compile and build binary by yourselves. For more detail, you can refer Appendix for information.
Developing FlexMatch features on Game Server or Client, it is possible to use Matchmaking without provisioning individual servers for Matchmaker. For this lab, you can use FlexMatch binary on bin/FlexMatch/GomokuServer.
-
Prepare compiled binary. It should be provided for this lab. However if you want to customize or debug, you can refer how to build source codes on Appendix.
-
Check whether there are files GomokuServer.exe, aws-cpp-sdk-*.dll, config.ini, install.bat, aws-cpp-sdk-gamelift-server.dll exist on given folder bin/GomokuServer.
It is required to install vc_redist.x86.exe for window servers in this workshop. Please place vc_redist.x86.exe files from This Link. You can also download Full version of deployment file from This Link
-
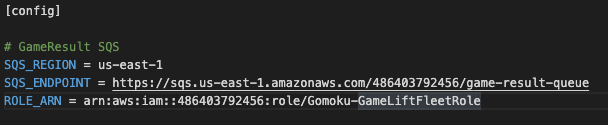
Edit config.ini using Text Editor. SQS_REGION means region that made Game Result SQS queue(ex : ap-northeast-1). Also, put SQS_ENDPOINT values of SQS endpoint URL.
-
For ROLE_ARN, you should insert IAM Role ARN for GameLift Fleet that we made last of part 1. (It is also possible to get Role ARN from Instance. In this lab, pass value through config.ini for comfort)
-
To upload Game Server Build on GameLift Service, we should use CLI. If you do not have CLI on your environment, please install referring HoL Preparation.
-
Upload build using GameLift CLI on the folder “GomokuServer” like below. (Please check GomokuServer directory contains Binaries folder and install.bat)
aws gamelift upload-build --name "GomokuServer-Build-1" --build-version "1.0.0" --build-root . --region <Your Lab Region>
-
Check whether region is configured well.
-
It is possible to see its progress when you access GameLift console. (https://console.aws.amazon.com/gamelift)
-
Click build that has uploaded just before. You are able to click “Create fleet from build” button. Clicking this button, create Game Server Fleet.

- Put information below. Other information can be configured as default.
- Name: GomokuGameServerFleet-1
- Instance Type: C5.large
- Fleet type: Spot
- Instance Role ARN: IAM Role ARN for GameLift Fleet that we made last page of part 1 (Gomoku-GameLiftFleetRole)
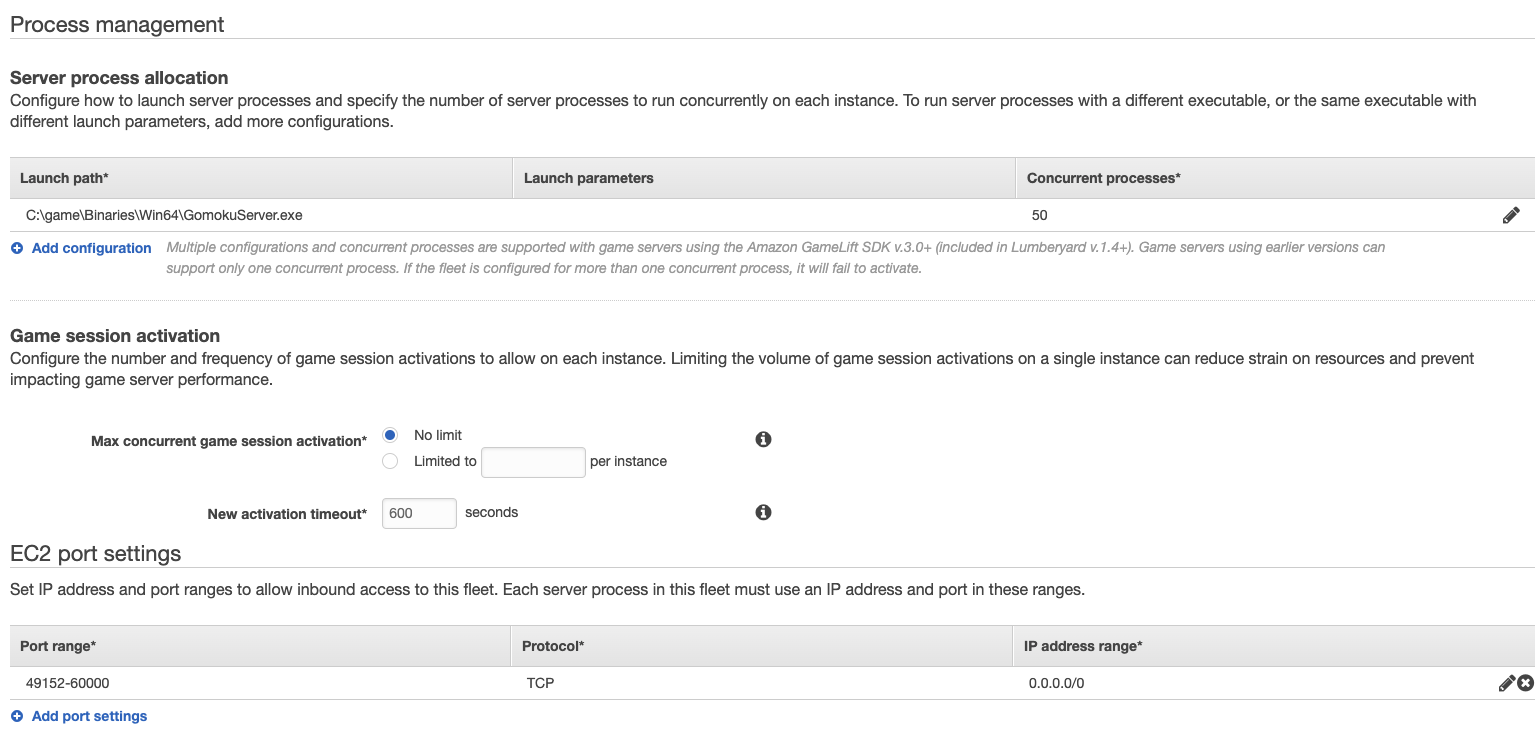
Process Management (Check Green button)
- Launch path: Binaries\Win64\GomokuServer.exe (If you compiled by yourselves, put path of your binary)
- Concurrency Process : 50
Network Configuration (Check Green button)
- EC2 Port Setting : 49152-60000
- Protocol : TCP
- IP address range : 0.0.0.0/0
You can focus Fleet Type “SPOT” on this setting. It is able to use your Game Server Instances cost-efficient by using Spot Fleet.
- Creating Server Fleet, it changes its status to “Active”, and its color to green. It takes around 20 minutes.
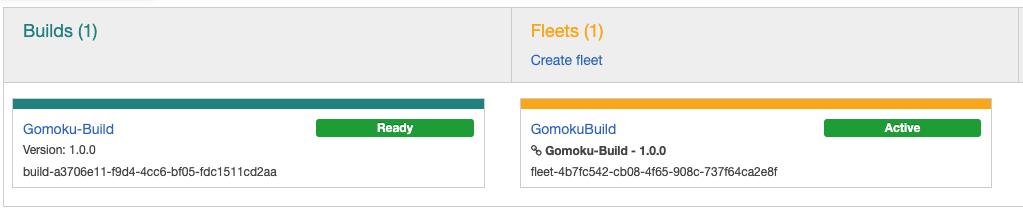
Picture above is built from another version and used to help understanding, it can be different from your lab environment.
-
Let’s create Alias until Fleet is launched.
-
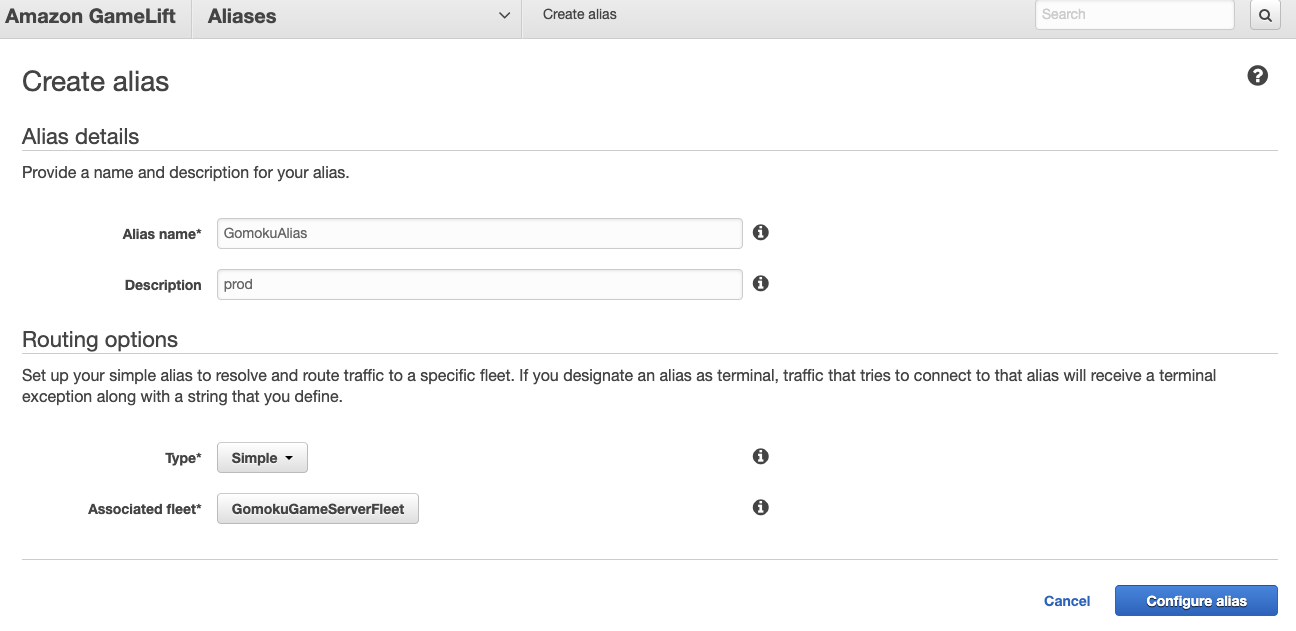
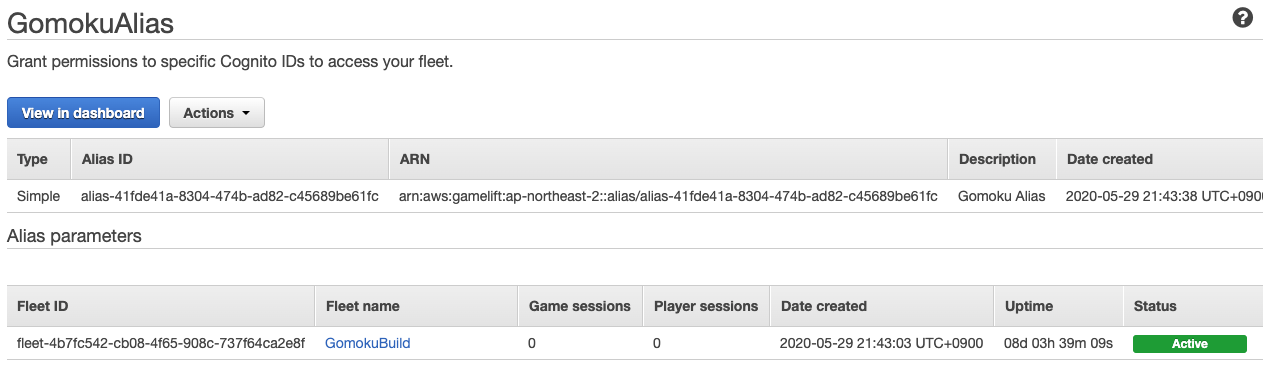
Click “Create Alias” on the menu. And make input for Alias name and Description.
-
Choose “Simple” for Routing options Type and click “Select Fleet” on Associated Fleet. Choose Fleet made right before.
It is possible to choose the fleet, even though it has not yet been made. When Alias is called, requests will pass to associated Fleet.
- We are using Alias ID, on Actual use case of GameLift Fleet. Save Alias ID when Alias is made.
- If there are no actions, the number of Fleet automatically scales-in to 0.
- In this lab, this would not be an issue, but if you would like to run server fleet longer, then you need to set scale parameter minimum 1. Or you can also override run instance more than 1.